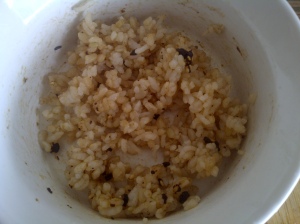
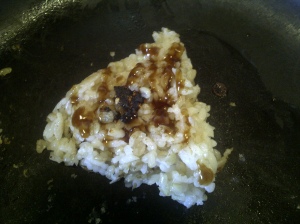
Onigiri is a Japanese staple and it’s an awesome on the go meal because of it’s portability! I loved the little guys so much in Japan that I had to have one everyday when I was there. Here’s a recipe for making a basic flavored version of them and if you feel like being a little adventurous, there’s a filled version for you to make as well! Then, if those are STILL too easy for you, I included a sesame miso toasted version and a yaki (grilled) version! Well, I’m going to stop rambling because this is already going to be a long post so without further ado, let’s get cooking!
Soy sauce based original or filled onigiri
Ingredients (makes 6):
3 cups cooked Japanese rice
1 tablespoon soy sauce (optional if you want it to have a soy flavor)
seaweed to wrap (optional)
pick a flavor:
basic: furikake to taste
umeboshi: 3 large umeboshis diced (salted plum), 3 tablespoons bonito flakes
fried rice: 1/4 cup edamame beans, 1/4 cup corn, 2 slices cheese diced, 1/4 cup ham diced, 1 egg (scrambled and diced)
wasabi-tuna-tempura: 1/3 cup tempera batter crumbs (tenkasu), 1/4 cup flaked tuna, 1 tablespoon sesame seeds, wasabi paste to taste (about 2 tablespoons)
Formation time!
ORIGINAL:
1. Combine the ingredients from your chosen flavor, soy sauce (if using) and rice in a large bowl then split it up into 6 equal portions.
2. Wet your hands with water to prevent the rice from sticking to them and then form a triangles with portions by using your thumb and index fingers in a “L” formation as a guide.
3. Wrap with seaweed if you like. MUNCH.
FILLED:
1. Mix all ingredients from your chosen flavor in a bowl and set aside. Then, combine the soy sauce (if using) and rice in a large bowl.
2. Wet your hands with water to prevent the rice from sticking to them and then grab a handful of rice and form it into a triangle by using your thumb and index fingers in a “L” formation as a guide.
3. Poke a hole into the center of your onigiri with your finger making sure it’s deep enough to contain a spoonful of filling. Place a bit of the filling inside and cover the whole with rice until the filling is covered.
4. Wrap with seaweed if you like. MUNCH!
Sesame-miso based grilled and baked onigiri
Ingredients (makes 6):
3 cups cooked Japanese rice
1 tablespoon sesame seeds
1/2 tablespoon miso mixed with 1 tablespoon water (or soy sauce if you don’t have any)
1 tablespoon mirin
1 teaspoon sugar
1/4 teaspoon dashi powder (optional)
sesame oil for cooking (about 1 tablespoon)
Toasted onigiri version:
1. Combine the miso paste, mirin, sugar and dashi together in a small bowl. Then, combine the miso mixture, rice and sesame seeds in a large bowl.
2. Wet your hands and then form 6 rice triangles with the rice.
3. Line a baking sheet with aluminum foil and toast the rice balls in the oven for 8-10 minutes on each side(keep an eye on them because toasting time varies between ovens).
4. Make sure you let them cool on the baking sheet for a bit before removing them or they’ll get stuck to the foil. ENJOY!
Yaki (grilled) onigiri version:
1. Combine the miso paste, mirin, sugar and dashi together in a small bowl; set aside. Then, combine the rice and sesame seeds in a large bowl.
2. Wet your hands and then form 6 rice triangles with the rice.
3. Heat sesame oil on medium heat in a frying pan. Then place the rice onto the pan. Cook until they’re lightly browned on both sides.
4. Brush the rice balls with the miso mixture and cook both sides until golden brown. You might want to do this step one by one to prevent them from burning.
5. MUNCH!


